# magentic-ui **Repository Path**: blackfox/magentic-ui ## Basic Information - **Project Name**: magentic-ui - **Description**: No description available - **Primary Language**: Unknown - **License**: MIT - **Default Branch**: main - **Homepage**: None - **GVP Project**: No ## Statistics - **Stars**: 0 - **Forks**: 0 - **Created**: 2025-06-28 - **Last Updated**: 2025-07-02 ## Categories & Tags **Categories**: Uncategorized **Tags**: None ## README
Magentic-UI Logo _Automate your web tasks while you stay in control_ [![image](https://img.shields.io/pypi/v/magentic_ui.svg)](https://pypi.python.org/pypi/magentic_ui) [![image](https://img.shields.io/pypi/l/magentic_ui.svg)](https://pypi.python.org/pypi/magentic_ui) ![Python Versions](https://img.shields.io/badge/python-3.10%20%7C%203.11%20%7C%203.12%20%7C%203.13-blue)
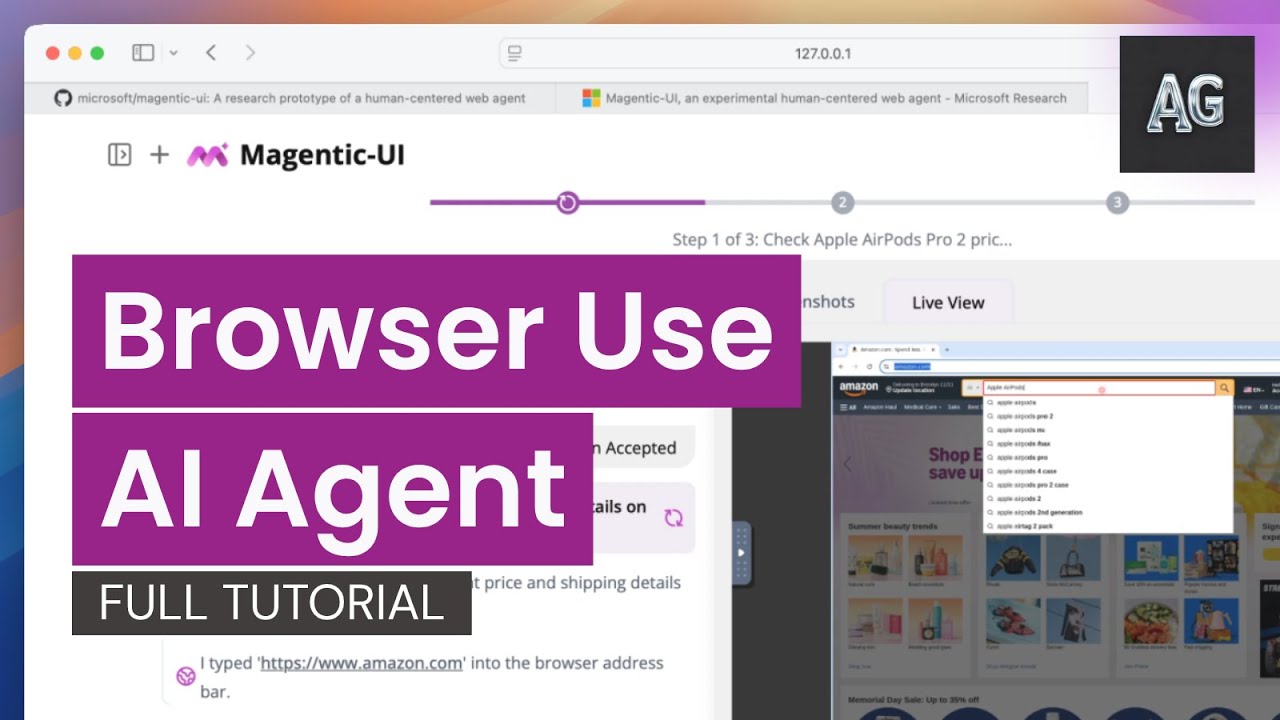
--- Magentic-UI is a **research prototype** of a human-centered interface powered by a multi-agent system that can browse and perform actions on the web, generate and execute code, and generate and analyze files. https://github.com/user-attachments/assets/7975fc26-1a18-4acb-8bf9-321171eeade7 Here's how you can get started with Magentic-UI: > **Note**: Before installing, please read the [pre-requisites](#-pre-requisites) carefully. Magentic-UI requires Docker to run, and if you are on Windows, you will need WSL2. We recommend using [uv](https://docs.astral.sh/uv/getting-started/installation/) for a quicker installation. If you are using Mac or Linux, you can skip the WSL2 step. ```bash python3 -m venv .venv source .venv/bin/activate pip install magentic-ui --upgrade # export OPENAI_API_KEY= magentic-ui --port 8081 ``` If your port is 8081, you can then access Magentic-UI at . If you are not able to setup Docker, you can run a limited version of Magentic-UI which does not have the ability to execute code, navigate files or display the browser in the interface with the command: ```bash magentic-ui --run-without-docker --port 8081 ``` You can also run Magentic-UI in a command-line-interface: ```bash magentic-cli --work-dir PATH/TO/STORE/DATA ``` ## 使用UV本地构建 构建后端: ```bash uv venv --python=3.12 .venv source .venv/bin/activate uv sync --all-extras ``` 构建前端: ```bash cd frontend pnpm install # 安装依赖 npm run build # 打包构建 ``` 运行: ```bash export OPENAI_API_KEY=sk-xxxx export OPENAI_BASE_URL=https://api.geekai.pro/v1 source .venv/bin/activate && magentic-ui --port 8081 ``` To use Azure models or Ollama please install with the optional dependencies: ```bash # for Azure pip install magentic-ui[azure] # for Ollama pip install magentic-ui[ollama] ``` For further details on installation please read the 🛠️ Installation section. For common installation issues and their solutions, please refer to the [troubleshooting document](TROUBLESHOOTING.md). ## Quick Navigation:

🟪 How it Works  |  🛠️ Installation  |  ⚠️ Troubleshooting  |  🤝 Contributing  |  📄 License

--- ## 🟪 How it Works

Magentic-UI

Magentic-UI is especially useful for web tasks that require actions on the web (e.g., filling a form, customizing a food order), deep navigation through websites not indexed by search engines (e.g., filtering flights, finding a link from a personal site) or tasks that need web navigation and code execution (e.g., generate a chart from online data). The interface of Magentic-UI is displayed in the screenshot above and consists of two panels. The left side panel is the sessions navigator where users can create new sessions to solve new tasks, switch between sessions and check on session progress with the session status indicators (🔴 needs input, ✅ task done, ↺ task in progress). The right-side panel displays the session selected. This is where you can type your query to Magentic-UI alongside text and image attachments and observe detailed task progress as well as interact with the agents. The session display itself is split in two panels: the left side is where Magentic-UI presents the plan, task progress and asks for action approvals, the right side is a browser view where you can see web agent actions in real time and interact with the browser. Finally, at the top of the session display is a progress bar that updates as Magentic-UI makes progress. The example below shows a step by step user interaction with Magentic-UI:

Magentic-UI Landing Co-Planning UI Co-Tasking UI Action Guard UI

What differentiates Magentic-UI from other browser use offerings is its transparent and controllable interface that allows for efficient human-in-the-loop involvement. Magentic-UI is built using [AutoGen](https://github.com/microsoft/autogen) and provides a platform to study human-agent interaction and experiment with web agents. Key features include: - 🧑‍🤝‍🧑 **Co-Planning**: Collaboratively create and approve step-by-step plans using chat and the plan editor. - 🤝 **Co-Tasking**: Interrupt and guide the task execution using the web browser directly or through chat. Magentic-UI can also ask for clarifications and help when needed. - 🛡️ **Action Guards**: Sensitive actions are only executed with explicit user approvals. - 🧠 **Plan Learning and Retrieval**: Learn from previous runs to improve future task automation and save them in a plan gallery. Automatically or manually retrieve saved plans in future tasks. - 🔀 **Parallel Task Execution**: You can run multiple tasks in parallel and session status indicators will let you know when Magentic-UI needs your input or has completed the task.
Watch the demo video
▶️ Click to watch a video and learn more about Magentic-UI
### ℹ️ Agentic Workflow Magentic-UI's underlying system is a team of specialized agents adapted from AutoGen's Magentic-One system illustrated in the figure below.

Magentic-UI

The agents work together to create a modular system: - 🧑‍💼 **Orchestrator** is the lead agent, powered by a large language model (LLM), that performs co-planning with the user, decides when to ask the user for feedback, and delegates sub-tasks to the remaining agents to complete. - 🌐 **WebSurfer** is an LLM agent equipped with a web browser that it can control. Given a request by the Orchestrator, it can click, type, scroll, and visit pages in multiple rounds to complete the request from the Orchestrator. This agent is a significant improvement over the AutoGen ``MultimodalWebSurfer`` in terms of the actions it can do (tab management, select options, file upload, multimodal queries). To learn more how this agent is built, follow along this [Tutorial: Building a Browser Use Agent From Scratch and with Magentic-UI ](docs/tutorials/web_agent_tutorial_full.ipynb). - 💻 **Coder** is an LLM agent equipped with a Docker code-execution container. It can write and execute Python and shell commands and provide a response back to the Orchestrator. - 📁 **FileSurfer** is an LLM agent equipped with a Docker code-execution container and file-conversion tools from the MarkItDown package. It can locate files in the directory controlled by Magentic-UI, convert files to markdown, and answer questions about them. - 🧑 **UserProxy** is an agent that represents the user interacting with Magentic-UI. The Orchestrator can delegate work to the user instead of the other agents. To interact with Magentic-UI, **users can enter a text message and attach images**. In response, Magentic-UI creates a natural-language step-by-step plan with which users can interact through a plan-editing interface. **Users can add, delete, edit, regenerate steps, and write follow-up messages to iterate on the plan.** While the user editing the plan adds an upfront cost to the interaction, it can potentially save a significant amount of time in the agent executing the plan and increase its chance at success. The plan is stored inside the Orchestrator and is used to execute the task. **For each step of the plan, the Orchestrator determines which of the agents (WebSurfer, Coder, FileSurfer) or the user should complete the step.** Once that decision is made, the Orchestrator sends a request to one of the agents or the user and waits for a response. After the response is received, the Orchestrator decides whether that step is complete. If the step is complete, the Orchestrator moves on to the following step. **Once all steps are completed, the Orchestrator generates a final answer that is presented to the user.** If, while executing any of the steps, the Orchestrator decides that the plan is inadequate (for example, because a certain website is unreachable), the Orchestrator can replan with user permission and execute a new plan. All intermediate progress steps are clearly displayed to the user. Furthermore, the user can pause the execution of the plan and send additional requests or feedback. The user can also configure through the interface whether agent actions (e.g., clicking a button) require approval. ### Autonomous Evaluation To evaluate its autonomous capabilities, Magentic-UI has been tested against several benchmarks when running with o4-mini: [GAIA](https://huggingface.co/datasets/gaia-benchmark/GAIA) test set (42.52%), which assesses general AI assistants across reasoning, tool use, and web interaction tasks ; [AssistantBench](https://huggingface.co/AssistantBench) test set (27.60%), focusing on realistic, time-consuming web tasks; [WebVoyager](https://github.com/MinorJerry/WebVoyager) (82.2%), measuring end-to-end web navigation in real-world scenarios; and [WebGames](https://webgames.convergence.ai/) (45.5%), evaluating general-purpose web-browsing agents through interactive challenges. To reproduce these experimental results, please see the following [instructions](experiments/eval/README.md). If you're interested in reading more checkout our [blog post](https://www.microsoft.com/en-us/research/blog/magentic-ui-an-experimental-human-centered-web-agent/). ## 🛠️ Installation ### 📝 Pre-Requisites **Note**: If you're using Windows, we highly recommend using [WSL2](https://docs.microsoft.com/en-us/windows/wsl/install) (Windows Subsystem for Linux). 1. If running on **Windows** or **Mac** you should use [Docker Desktop](https://www.docker.com/products/docker-desktop/) or if inside WSL2 you can install Docker directly inside WSL [docker in WSL2 guide](https://gist.github.com/dehsilvadeveloper/c3bdf0f4cdcc5c177e2fe9be671820c7). If running on **Linux**, you should use [Docker Engine](https://docs.docker.com/engine/install/). If using Docker Desktop, make sure it is set up to use WSL2: - Go to Settings > Resources > WSL Integration - Enable integration with your development distro You can find more detailed instructions about this step [here](https://docs.microsoft.com/en-us/windows/wsl/tutorials/wsl-containers). 2. During the Installation step, you will need to set up your `OPENAI_API_KEY`. To use other models, review the [Custom Client Configuration](#Configuration) section below. 3. You need at least [Python 3.10](https://www.python.org/downloads/) installed. If you are on Windows, we recommend to run Magentic-UI inside [WSL2](https://docs.microsoft.com/en-us/windows/wsl/install) (Windows Subsystem for Linux) for correct Docker and file path compatibility. ### PyPI Installation Magentic-UI is available on PyPI. We recommend using a virtual environment to avoid conflicts with other packages. ```bash python3 -m venv .venv source .venv/bin/activate pip install magentic-ui ``` Alternatively, if you use [`uv`](https://docs.astral.sh/uv/getting-started/installation/) for dependency management, you can install Magentic-UI with: ```bash uv venv --python=3.12 .venv . .venv/bin/activate uv pip install magentic-ui ``` ### Running Magentic-UI To run Magentic-UI, make sure that Docker is running, then run the following command: ```bash magentic-ui --port 8081 ``` The first time that you run this command, it will take a while to build the Docker images -- go grab a coffee or something. The next time you run it, it will be much faster as it doesn't have to build the Docker again. If you have trouble building the dockers, please try to rebuild them with the command: ```bash magentic-ui --rebuild-docker --port 8081 ``` If you face further issues, please refer to the [TROUBLESHOOTING.md](TROUBLESHOOTING.md) document. Once the server is running, you can access the UI at . You can also run a command line interface (CLI) for Magentic-UI with the command: ```bash magentic-cli --work-dir PATH_TO_STORE_LOGS ``` ### Configuration #### Model Client Configuration If you want to use a different OpenAI key, or if you want to configure use with Azure OpenAI or Ollama, you can do so inside the UI by navigating to settings (top right icon) and changing model configuration with the format of the `config.yaml` file below. You can also create a `config.yaml` and import it inside the UI or point Magentic-UI to its path at startup time: ```bash magentic-ui --config path/to/config.yaml ``` An example `config.yaml` for OpenAI is given below: ```yaml # config.yaml ###################################### # Default OpenAI model configuration # ###################################### model_config: &client provider: autogen_ext.models.openai.OpenAIChatCompletionClient config: model: gpt-4o api_key: max_retries: 10 ########################## # Clients for each agent # ########################## orchestrator_client: *client coder_client: *client web_surfer_client: *client file_surfer_client: *client action_guard_client: *client ``` The corresponding configuration for Azure OpenAI is: ```yaml # config.yaml ###################################### # Azure model configuration # ###################################### model_config: &client provider: AzureOpenAIChatCompletionClient config: model: gpt-4o azure_endpoint: "" azure_deployment: "" api_version: "2024-10-21" azure_ad_token_provider: provider: autogen_ext.auth.azure.AzureTokenProvider config: provider_kind: DefaultAzureCredential scopes: - https://cognitiveservices.azure.com/.default max_retries: 10 ########################## # Clients for each agent # ########################## orchestrator_client: *client coder_client: *client web_surfer_client: *client file_surfer_client: *client action_guard_client: *client ``` #### MCP Server Configuration You can also extend Magentic-UI's capabilities by adding custom "McpAgents" to the multi-agent team. Each McpAgent can have access to one or more MCP Servers. You can specify these agents via the `mcp_agent_configs` parameter in your `config.yaml`. For example, here's an agent called "airbnb_surfer" that has access to the OpenBnb MCP Server running locally via Stdio. ```yaml mcp_agent_configs: - name: airbnb_surfer description: "The airbnb_surfer has direct access to AirBnB." model_client: provider: OpenAIChatCompletionClient config: model: gpt-4.1-2025-04-14 max_retries: 10 system_message: |- You are AirBnb Surfer, a helpful digital assistant that can help users acces AirBnB. You have access to a suite of tools provided by the AirBnB API. Use those tools to satisfy the users requests. reflect_on_tool_use: false mcp_servers: - server_name: AirBnB server_params: type: StdioServerParams command: npx args: - -y - "@openbnb/mcp-server-airbnb" - --ignore-robots-txt ``` Under the hood, each `McpAgent` is just a `autogen_agentchat.agents.AssistantAgent` with the set of MCP Servers exposed as an `AggregateMcpWorkbench` which is simply a named collection of `autogen_ext.tools.mcp.McpWorkbench` objects (one per MCP Server). Currently the supported MCP Server types are `autogen_ext.tools.mcp.StdioServerParams` and `autogen_ext.tools.mcp.SseServerParams`. ### Building Magentic-UI from source This step is primarily for users seeking to make modifications to the code, are having trouble with the pypi installation or want the latest code before a pypi version release. #### 1. Make sure the above prerequisites are installed, and that Docker is running. #### 2. Clone the repository to your local machine: ```bash git clone https://github.com/microsoft/magentic-ui.git cd magentic-ui ``` #### 3. Install Magentic-UI's dependencies with uv: ```bash # install uv through https://docs.astral.sh/uv/getting-started/installation/ uv venv --python=3.12 .venv uv sync --all-extras source .venv/bin/activate ``` #### 4. Build the frontend: First make sure to install node: ```bash # install nvm to install node curl -o- https://raw.githubusercontent.com/nvm-sh/nvm/v0.40.1/install.sh | bash nvm install node ``` Then install the frontend: ```bash cd frontend npm install -g gatsby-cli npm install --global yarn yarn install yarn build ``` #### 5. Run Magentic-UI, as usual. ```bash magentic-ui --port 8081 ``` >**Note**: Running this command for the first time will build two docker containers required for the Magentic-UI agents. If you encounter problems, you can build them directly with the following commands from inside the repository: ```bash docker build -t magentic-ui-vnc-browser:latest ./src/magentic_ui/docker/magentic-ui-browser-docker docker build -t magentic-ui-python-env:latest ./src/magentic_ui/docker/magentic-ui-python-env ``` #### Running the UI from source If you are making changes to the source code of the UI, you can run the frontend in development mode so that it will automatically update when you make changes for faster development. 1. Open a separate terminal and change directory to the frontend ```bash cd frontend ``` 2. Create a `.env.development` file. ```bash cp .env.default .env.development ``` 3. Launch frontend server ```bash npm run start ``` 4. Then run the UI: ```bash magentic-ui --port 8081 ``` The frontend from source will be available at , and the compiled frontend will be available at . ## ⚠️ Troubleshooting If you were unable to get Magentic-UI running, do not worry! The first step is to make sure you have followed the steps outlined above, particularly with the [pre-requisites](#-pre-requisites). For common issues and their solutions, please refer to the [TROUBLESHOOTING.md](TROUBLESHOOTING.md) file in this repository. If you do not see your problem there, please open a `GitHub Issue`. ## 🤝 Contributing This project welcomes contributions and suggestions. For information about contributing to Magentic-UI, please see our [CONTRIBUTING.md](CONTRIBUTING.md) guide, which includes current issues to be resolved and other forms of contributing. This project has adopted the [Microsoft Open Source Code of Conduct](https://opensource.microsoft.com/codeofconduct/). For more information, see the [Code of Conduct FAQ](https://opensource.microsoft.com/codeofconduct/faq/) or contact [opencode@microsoft.com](mailto:opencode@microsoft.com) with any additional questions or comments. ## 📄 License Microsoft, and any contributors, grant you a license to any code in the repository under the [MIT License](https://opensource.org/licenses/MIT). See the [LICENSE](LICENSE) file. Microsoft, Windows, Microsoft Azure, and/or other Microsoft products and services referenced in the documentation may be either trademarks or registered trademarks of Microsoft in the United States and/or other countries. The licenses for this project do not grant you rights to use any Microsoft names, logos, or trademarks. Microsoft's general trademark guidelines can be found at . Any use of third-party trademarks or logos are subject to those third-party's policies. Privacy information can be found at Microsoft and any contributors reserve all other rights, whether under their respective copyrights, patents, or trademarks, whether by implication, estoppel, or otherwise.