# uniapp仿网易云音乐项目
**Repository Path**: fengxian_duck/netease-cloud-music
## Basic Information
- **Project Name**: uniapp仿网易云音乐项目
- **Description**: 这是一个用跨平台技术uniapp写的仿照网易云音乐小程序版的项目,已经写的和网易差不多了,并且用uniapp快速开发了安卓app和h5以及小程序,节省了90%以上的开发时间!
后端是采用开源的基于NodeJs跨域拦截的接口,由于网易对接口的保护越来越严格,我花了好多时间避开身份认证而去调用这些接口
- **Primary Language**: Unknown
- **License**: Apache-2.0
- **Default Branch**: master
- **Homepage**: https://cdn.fengxianhub.top/eureka-static/netEaseCloudMusic/index.html
- **GVP Project**: No
## Statistics
- **Stars**: 35
- **Forks**: 11
- **Created**: 2022-04-22
- **Last Updated**: 2024-12-13
## Categories & Tags
**Categories**: Uncategorized
**Tags**: uni-app, 网易云音乐
## README
# uniapp仿网易云音乐项目(发布小程序、H5和安卓App)
#### 介绍
这是一个用跨平台技术uniapp写的仿照网易云音乐小程序版的项目,已经写的和网易差不多了,并且用uniapp快速开发了安卓app和h5以及小程序,节省了90%以上的开发时间!
后端是采用开源的基于NodeJs跨域拦截集成,由于网易对接口的保护,我花了好多时间避开身份认证而去调用这些接口
项目是看千锋教育Ghost老师的视频做的,我在老师的基础上把背景处理了一下并且让那根杆子可以动起来,让整个界面更合理了一些
传输门:https://www.bilibili.com/video/BV1VM4y1g7eg?p=1
我这边编译成微信小程序、H5、和安卓App了,都在我的仓库里面,里面也有老师的资料
**创作不易请不要吝啬你的star**
先看下H5端演示(已经跟网易云小程序版做的差不多了),H5地址:
>可以看到其实还是有些兼容性的问题的,可能还需要在小程序端调整一下,大部分功能是一样的
>App也有一些兼容性的问题,但是开发效率摆在这里,后期可以调整
 ## 1. 环境准备
项目所需环境:
- 网易云音乐接口文档(非官方):https://neteasecloudmusicapi.vercel.app/#/
- 音乐接口后端地址:https://github.com/Binaryify/NeteaseCloudMusicApi
- 自行下载HBuildX和微信小程序开发助手并注册小程序开发者账户
### 1.1 本地安装后端
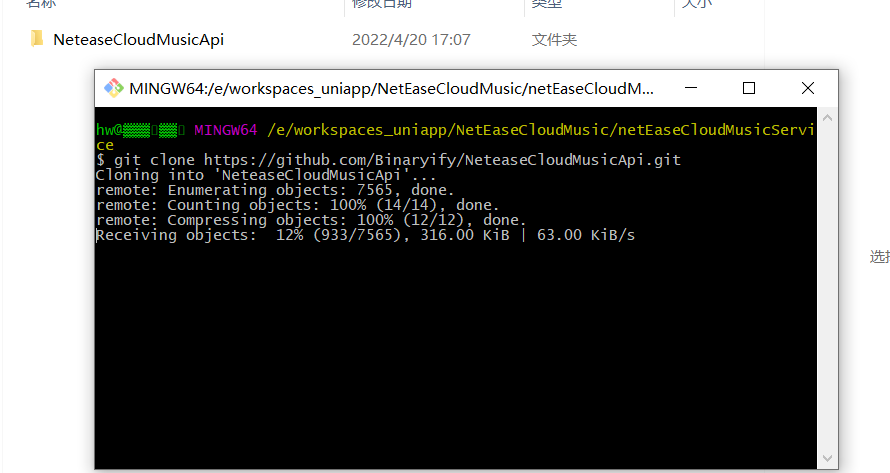
首先我们需要把后端代码克隆下来:
```java
git clone https://github.com/Binaryify/NeteaseCloudMusicApi.git
```
安装项目所需的依赖模块(cmd进入项目)
```java
cnpm i
```
安装好了就可以启动了
```java
npm start
```
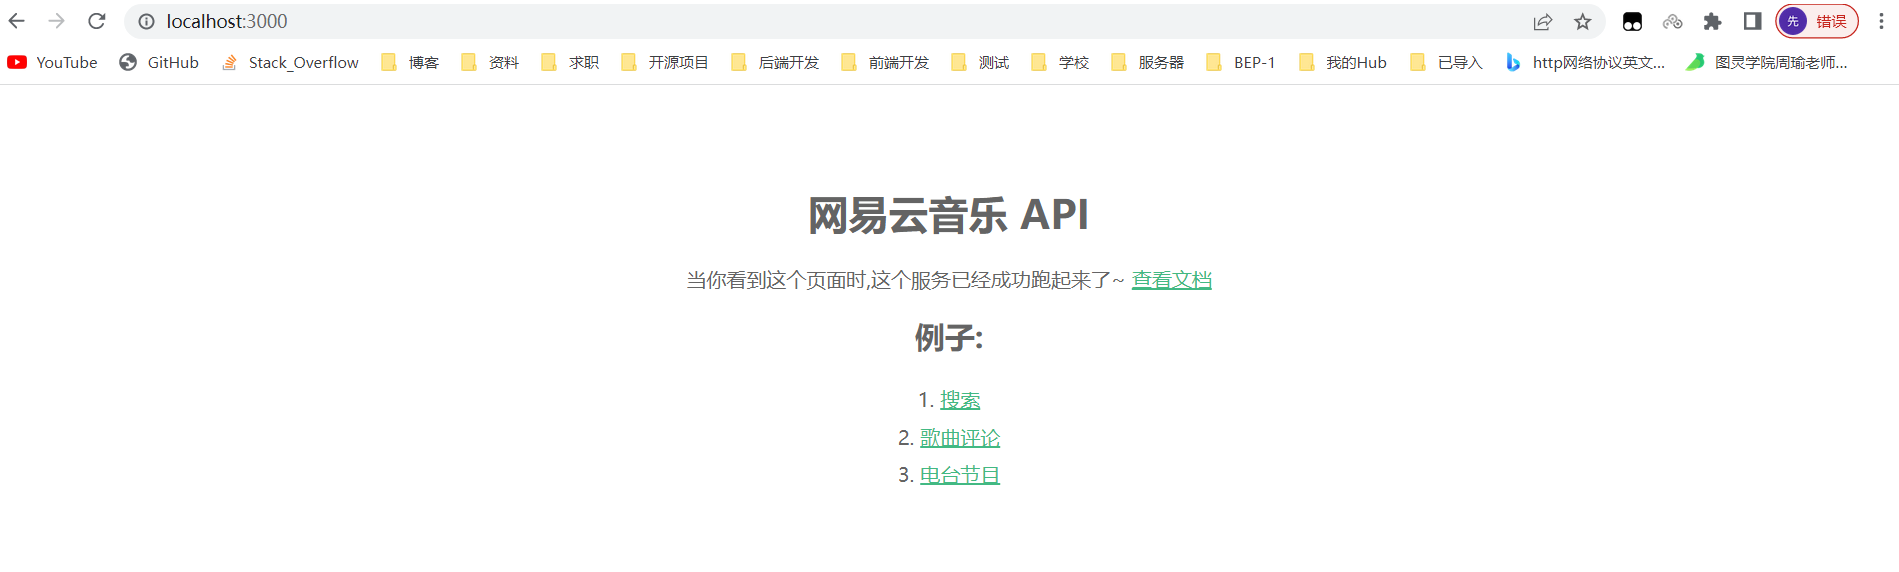
然后就可以访问后端了,默认端口3000
### 1.2 docker安装后端
>我这里在服务器上用docker安装一次
先拉取镜像:
```java
docker pull binaryify/netease_cloud_music_api
```

启动:
```java
docker run -d -p 3000:3000 --name netease_cloud_music_api binaryify/netease_cloud_music_api
```
这里接口文档有一些提示:
>注意: 在 docker 中运行的时候, 由于使用了 request 来发请求, 所以会检查几个 proxy 相关的环境变量(如下所列), 这些环境变量 会影响到 request 的代理, 详情请参考[request 的文档](https://github.com/request/request#proxies), 如果这些环境变量 指向的代理不可用, 那么就会造成错误, 所以在使用 docker 的时候一定要注意这些环境变量. 不过, 要是你在 query 中加上了 proxy 参数, 那么环境变量会被覆盖, 就会用你通过 proxy 参数提供的代理了.
我这里没管了,详情请参见官网(可以私信我要一下我的接口)
## 2. 首页
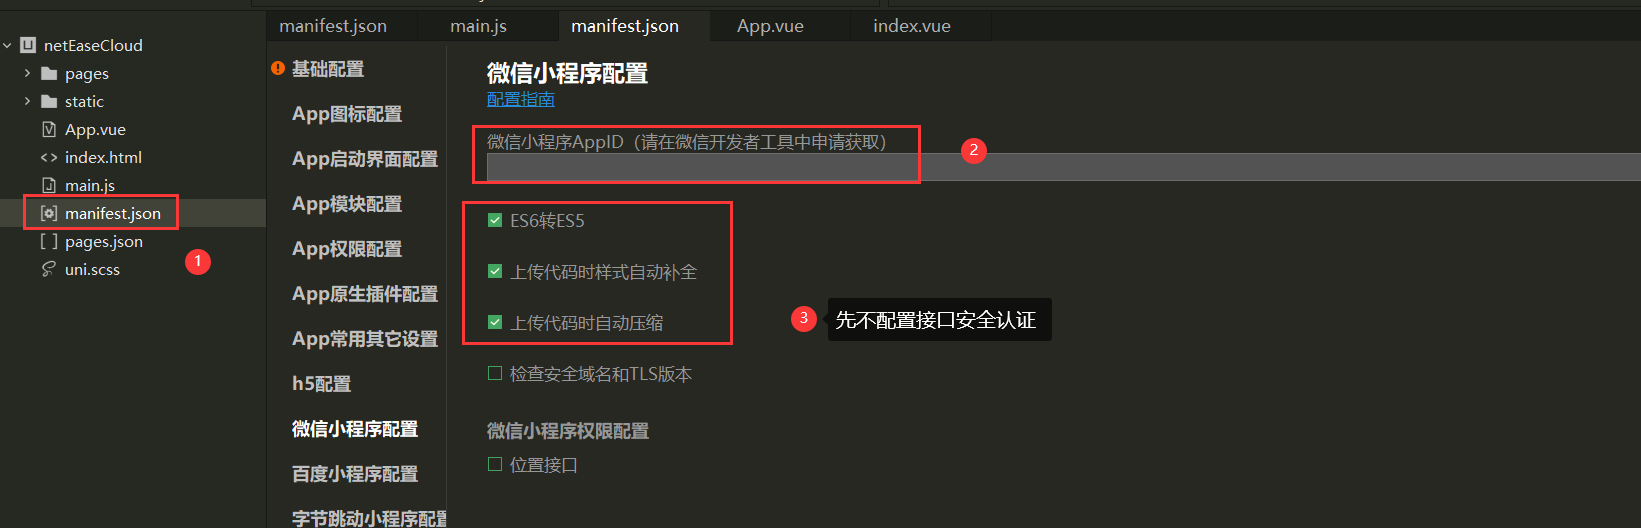
选择创建uniapp的项目并配置好你的小程序AppID
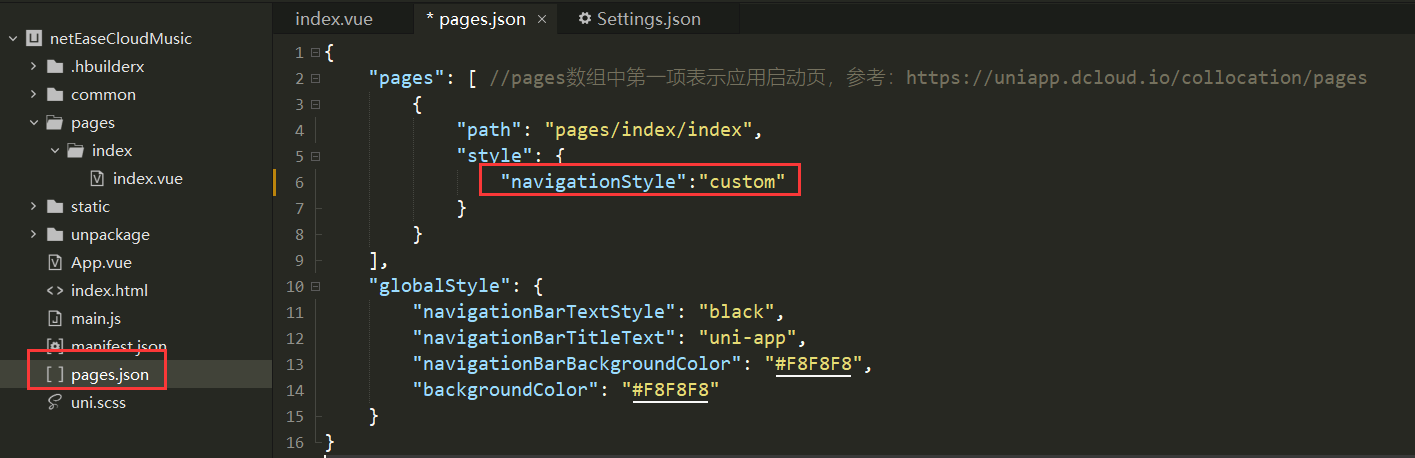
### 2.1 自定义navigationStyle
我们可以将navigationStyle设置为空然后自定义
```java
"navigationStyle":"custom"
```
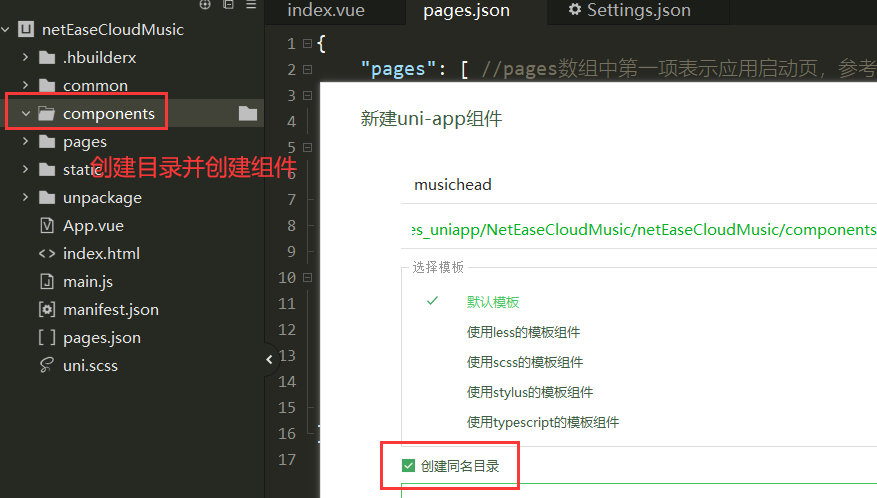
### 2.2 封装navigationStyle组件
由于navigationStyle在很多界面都需要用到,所以我们可以将其封装成为一个组件
这里的设置和vue一样,现在index.vue里面使用自定义的组件,然后将值传给封装好的组件
```vue
```
组件用`props:['title']`进行接收:
```vue
{{title}}
```
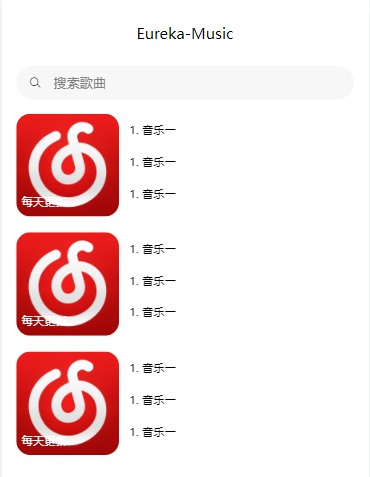
### 2.3 首页基本布局
```vue
每天更新
1. 音乐一
1. 音乐一
1. 音乐一
```
先将样式写到这里:
### 2.4 接口调用&数据渲染
>接下来我们去调用我们的接口
在官方文档里面搜索排行榜,找到接口对应的调用方式
```java
所有榜单内容摘要
说明 : 调用此接口,可获取所有榜单内容摘要
接口地址 : /toplist/detail
调用例子 : /toplist/detail
```
我们将所有的请求都封装好,在common目录下创建两个文件`config.js`和`api.js`
config.js
```vue
export const baseUrl = 'http://localhost:3000/';
```
api.js
```javascript
import { baseUrl } from './config.js';
/**
* 歌曲榜单
*/
export function topList(){
// 只需要前四个榜单
var listIds = ['3' , '0' , '2' , '1' ];
return new Promise(function(resolve,reject){
uni.request({
url: `${baseUrl}/toplist/detail`,
method: 'GET',
data: {},
success: res => {
console.log(res);
let result = res.data.list;
result.length = 4;
for(let i=0;i {
console.log(err);
},
complete: () => {}
});
});
}
```
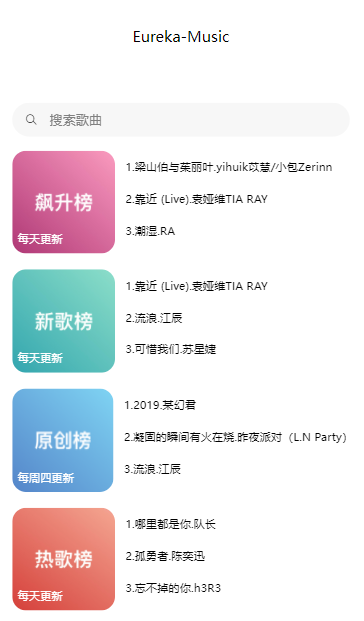
在首页渲染数据
```vue
{{item.updateFrequency}}
{{index+1}}.{{musicItem.first}}.{{musicItem.second}}
```
渲染好后前端就有界面了
## 3. 榜单详情页
接下来我们做首页里面的详情页面
首先我们先创建对应的文件
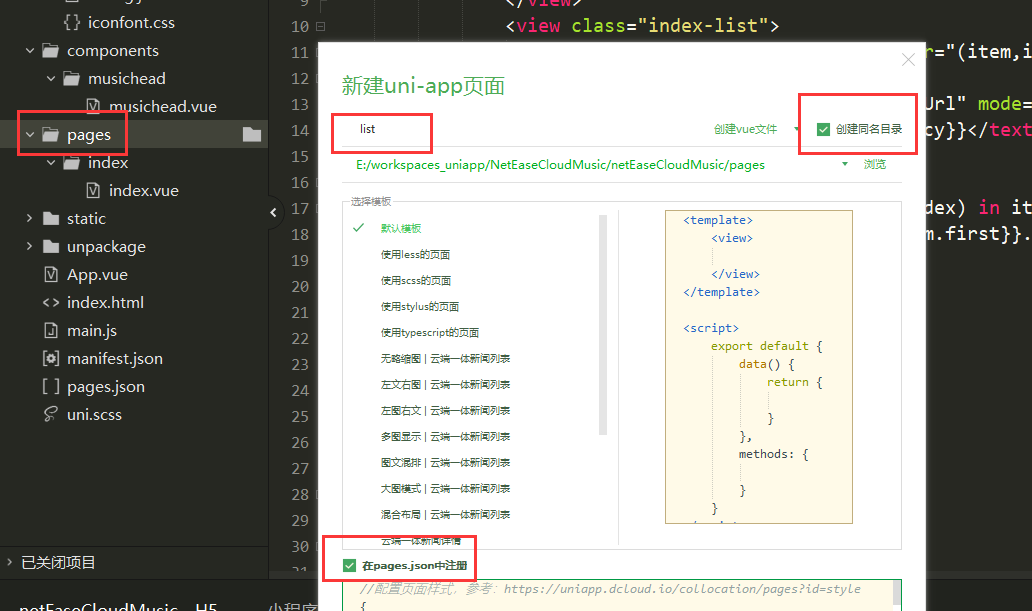
在`pages.json`中会自动生成路由,记得将head改成我们自定义的
```javascript
"navigationStyle":"custom",
```
接下来我们设置一下编译模式让我们不需要每次都点到这个界面中
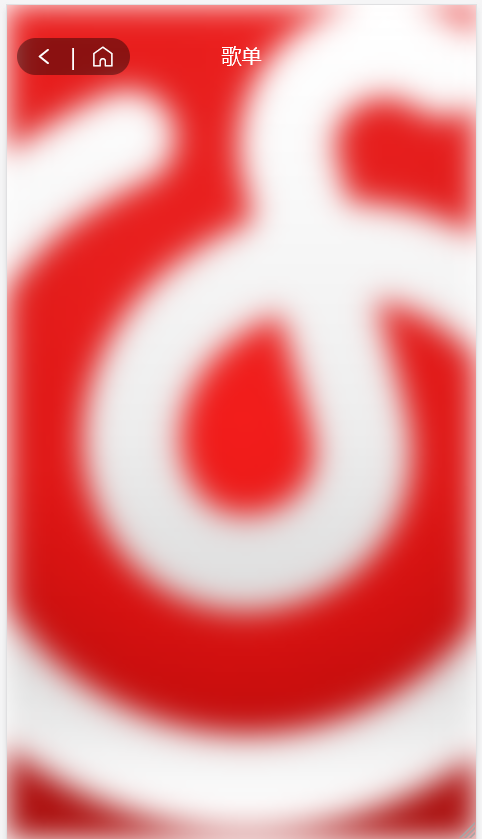
### 3.1 详情页布局
先进行简单布局,添加一张背景图片
```vue
```
样式写到全局配置文件App.vue中
```css
.flexbg {
z-index: -1;
width: 100%;
height: 100vh;
position: fixed;
left: 0;
top: 0;
background-image: url(./static/wangyiyunyinyue.png);
background-size: cover;
background-position: center 0;
/* 背景模糊以及毛边框特效 */
filter: blur(10px);
transform: scale(1.2);
}
```
我们就可以得到一个基本的样子:
### 3.2 渲染数据
接下来我们写此界面中滚动条的部分
我们先写一下上面的布局
```vue
30亿
测试文字
测试文字2
段落测试文字段落测试文字段落测试文字段落测试文字段落测试文字
```
写完之后基本的样子就有了
>这里有一个问题,网易云对榜单歌曲的接口进行了限制,在不登录情况下是拿不到信息的
这里我们只能曲线救国,通过歌曲详情接口拿到这些数据,具体做法为:
先拿到榜单的id直接传给list组件

list组件再拿着id调用歌单接口:
```javascript
/**
* 根据首页歌曲模块获取具体歌单
* @param {列表id} listId
*/
export function list(listId){
return uni.request({
url: `${baseUrl}/playlist/detail?id=${listId}`,
method: 'GET'
});
}
```
这样就可以再不登录的情况下拿到自己想要的榜单数据
现在我们将数据渲染上去:
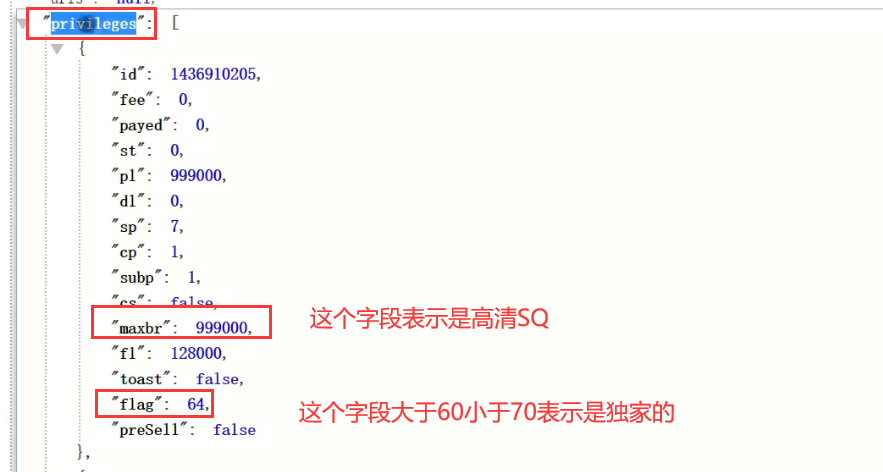
其中列表下面可能会有SQ(高清)和`独家`的标识,这两个标识可以从下面字段拿到
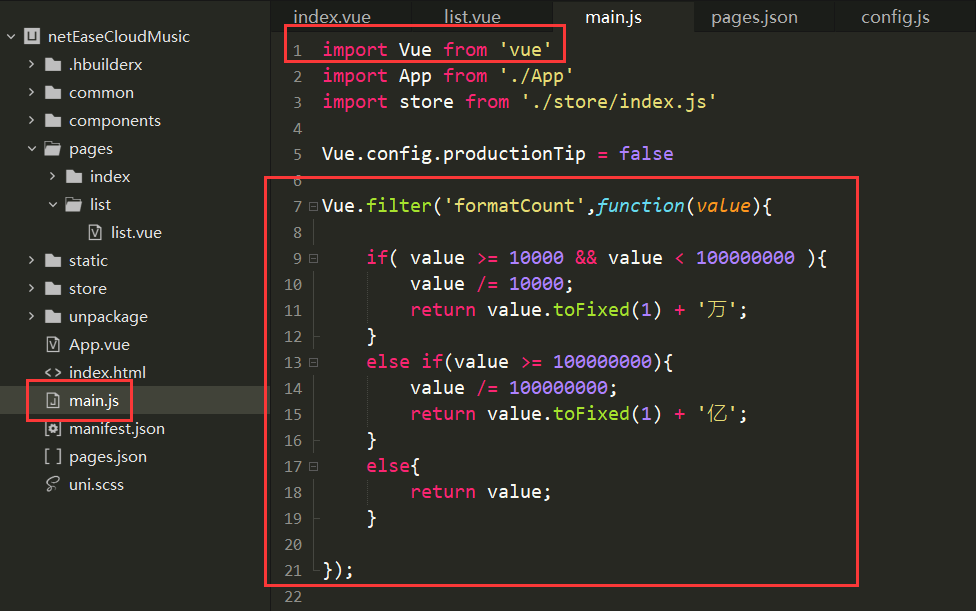
这里我们添加一个过滤器将榜单上面的数字格式一下,这里由于后面点赞也需要用到这个过滤器,所以我们写到全局文件里面
```vue
Vue.filter('formatCount',function(value){
if( value >= 10000 && value < 100000000 ){
value /= 10000;
return value.toFixed(1) + '万';
}
else if(value >= 100000000){
value /= 100000000;
return value.toFixed(1) + '亿';
}
else{
return value;
}
});
```
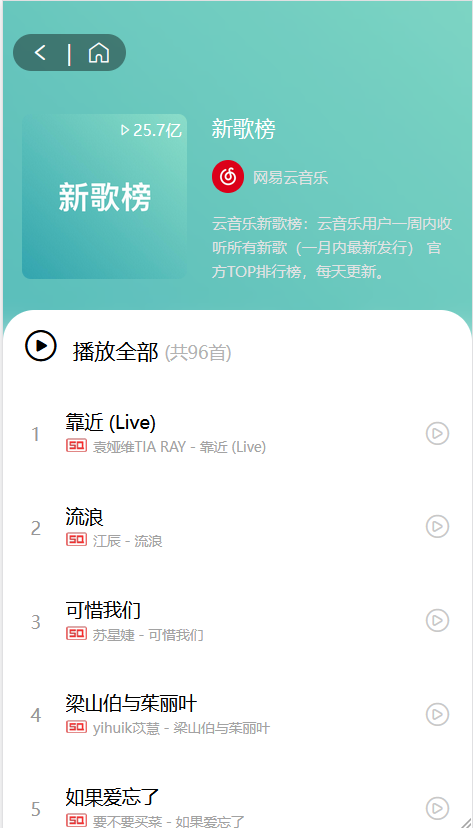
### 3.3 完整代码
这里贴一下完整的代码:
完成后的效果就是这样了,其实已经和网易云一模一样了
```vue
{{ playlist.playCount | formatCount }}
{{ playlist.name }}
{{ playlist.creator.nickname }}
{{ playlist.description }}
播放全部
(共{{ playlist.trackCount }}首)
{{ index + 1 }}
{{ item.name }}
{{ item.ar[0].name }} - {{ item.name }}
```
## 4. 歌曲详情页
同样我们要写成自定义头的形式
首先我们写跳转的代码,在每首歌的item中添加事件
```javascript
@tap="handleToDetail(item.id)
methods: {
handleToDetail(id) {
uni.navigateTo({
url: '/pages/detail/detail?songId=' + id
});
}
}
```
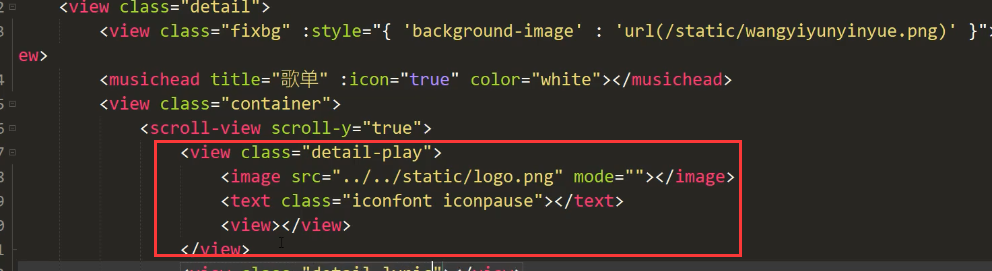
### 4.1 歌曲详细页布局
这里的布局元素就稍稍要丰富一些了
先对播放的圆盘以及那根棍子布局一下
写一点样式让其位置更加合理
```css
.detail-play{ width:580rpx; height:580rpx; background:url(~@/static/disc.png); background-size:cover; margin:210rpx auto 44rpx auto; position: relative;}
.detail-play image{ width:380rpx; height:380rpx; border-radius: 50%; position: absolute; left:0; top:0; right:0; bottom:0; margin:auto; animation:10s linear infinite move; animation-play-state: paused;}
@keyframes move{
from{ transform : rotate(0deg);}
to{ transform : rotate(360deg);}
}
.detail-play .detail-play-run{ animation-play-state: running;}
.detail-play text{ width:100rpx; height:100rpx; font-size:100rpx; position: absolute; left:0; top:0; right:0; bottom:0; margin:auto; color:white;}
.detail-play view{ position: absolute; width:170rpx; height:266rpx; position: absolute; left:60rpx; right:0; margin:auto; top:-170rpx; background:url(~@/static/needle.png); background-size:cover;}
```
调完样式之后布局就比较合理了

接下来就是其他的一些布局,这里有的组件就不做了
这里写的断断续续的就把最后面弄好的一起贴上来吧,这里面包含了渲染数据的部分,布局的代码都注释掉了
效果:
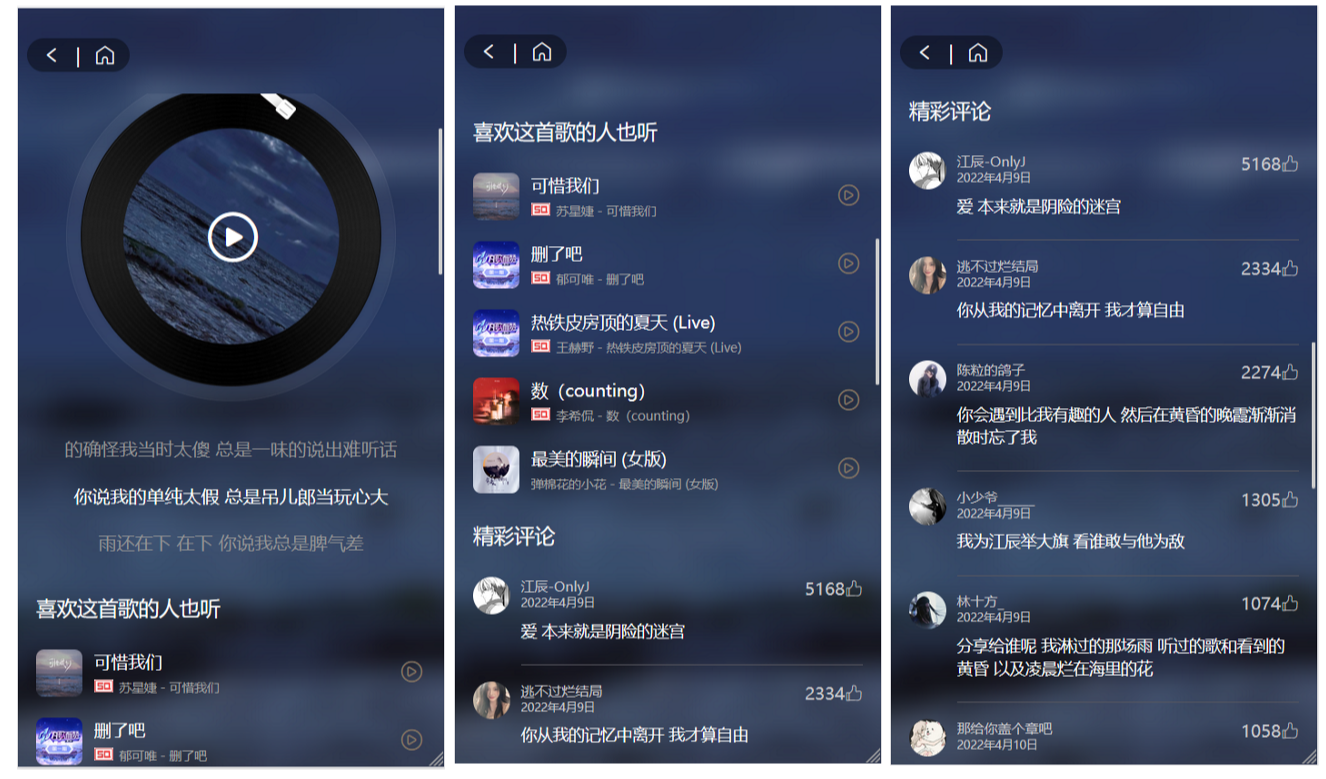
```vue
{{ item.lyric }}
喜欢这首歌的人也听
{{item.name}}
{{item.artists[0].name}} - {{item.name}}
```
### 4.2 歌曲接口
```css
http://localhost:3000/song/detail?ids=483937795 ##歌曲详情接口
http://localhost:3000/simi/song?id=483937795 ##和当前歌曲相似的歌曲接口
http://localhost:3000/comment/music?id=483937795 ##歌曲评论接口
http://localhost:3000/lyric?id=483937795 ##歌词接口
http://localhost:3000/song/url?id=483937795 ##播放音乐接口
```
我们在api.js里将这些接口封装一下
```javascript
/**
* 歌曲详情接口
* @param {歌曲id} id
*/
export function songDetail(id) {
return uni.request({
url: `${baseUrl}/song/detail?ids=${id}`,
method: 'GET'
})
}
/**
* 播放歌曲接口
* @param {Object} id
*/
export function songUrl(id) {
return uni.request({
url: `${baseUrl}/song/url?id=${id}`,
method: 'GET'
})
}
/**
* 歌词接口
* @param {Object} id
*/
export function songLyric(id) {
return uni.request({
url: `${baseUrl}/lyric?id=${id}`,
method: 'GET'
})
}
/**
* 和当前歌曲类似歌曲接口
* @param {Object} id
*/
export function songSimi(id) {
return uni.request({
url: `${baseUrl}/simi/song?id=${id}`,
method: 'GET'
})
}
/**
* 评论接口
* @param {Object} id
*/
export function songComment(id) {
return uni.request({
url: `${baseUrl}/comment/music?id=${id}`,
method: 'GET'
})
}
```
### 4.3 数据渲染
在4.1里面已经有渲染的代码了
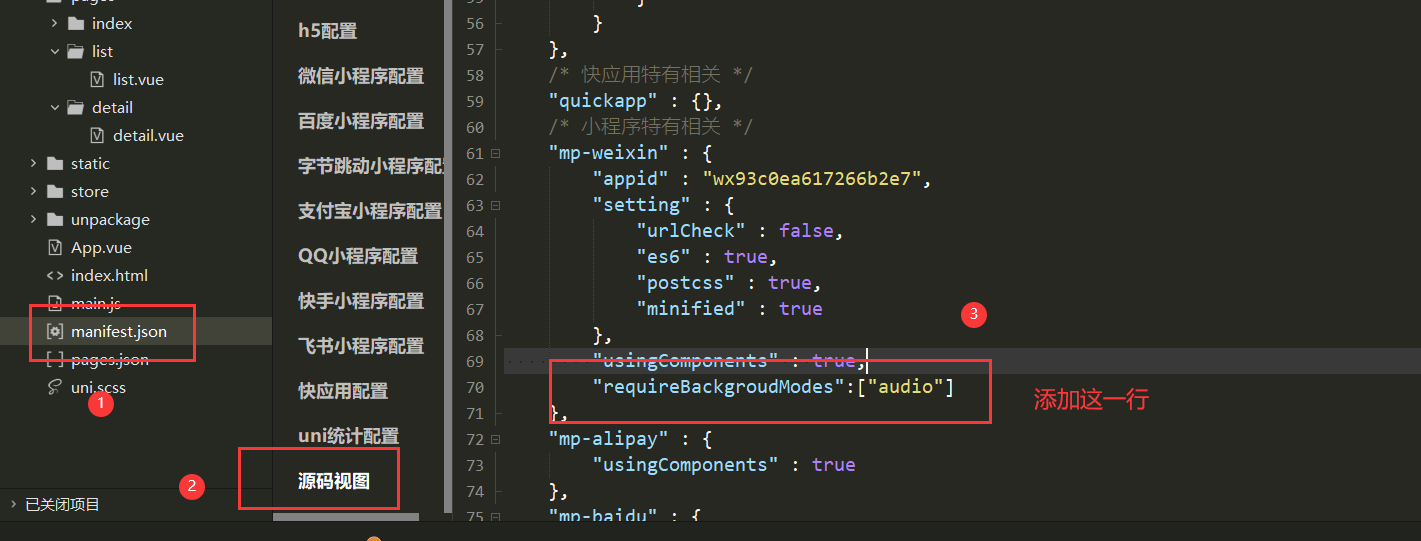
### 4.4 设置背景音乐管理器
这里需要配置一下,不然在微信小程序端会出现不能播放音乐的现象
```css
"requireBackgroudModes":["audio"]
```
### 4.5 VueX共享数据
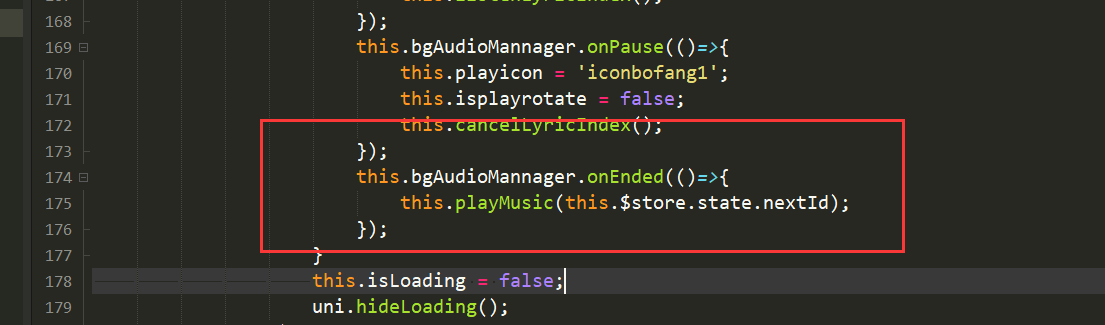
现在我们有一个问题,当播放完一首歌后我们需要它自动切换到下一首歌,这里就需要我们用VueX传递一下信息了
在Uniapp中内置了VueX,所以不用安装依赖了可以直接引入
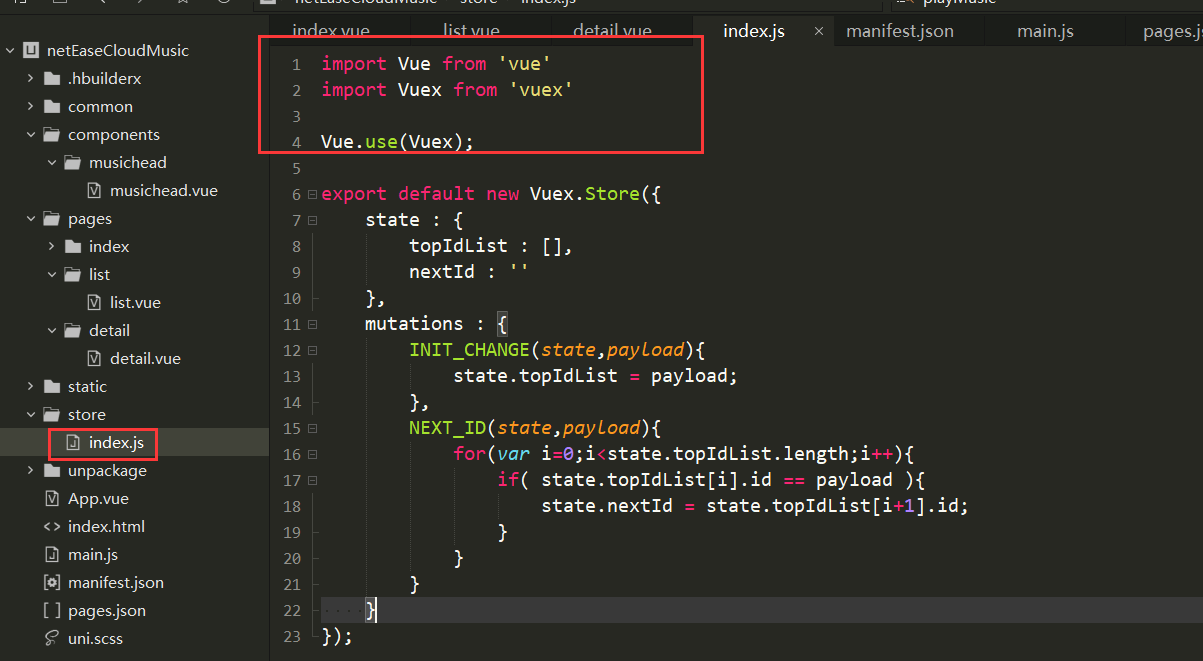
```javascript
this.$store.commit('INIT_CHANGE', this.playlist.trackIds);
```
我们看一下有没有存入
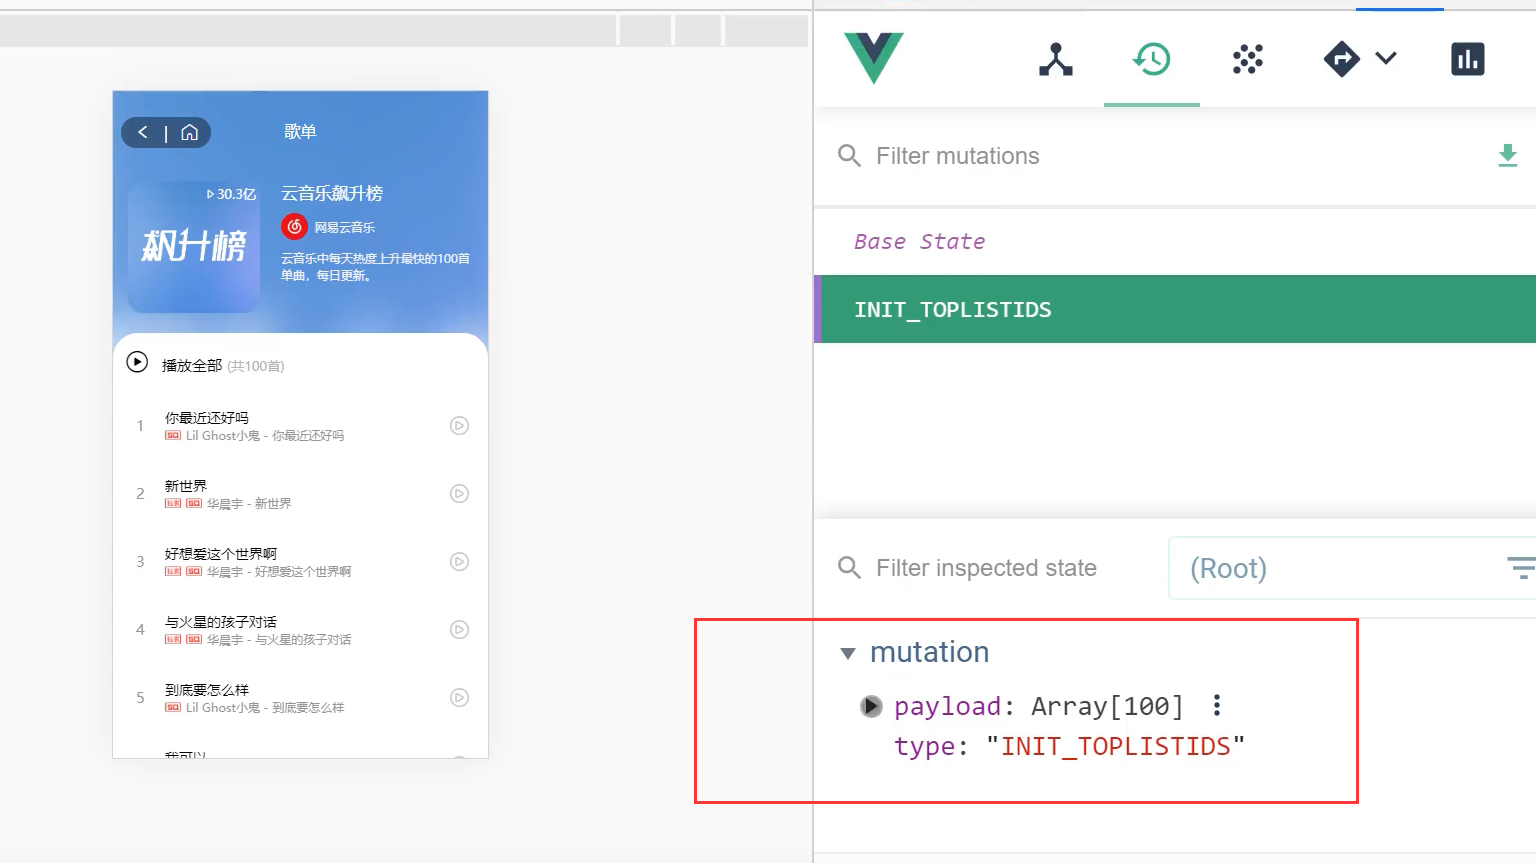
接下来让其播放下一首就可以了
## 5. 搜索页
### 5.1 搜索页布局
这里的布局和之前类似,先把组件和一些一样的样式复制过来,这里直接贴一下样式
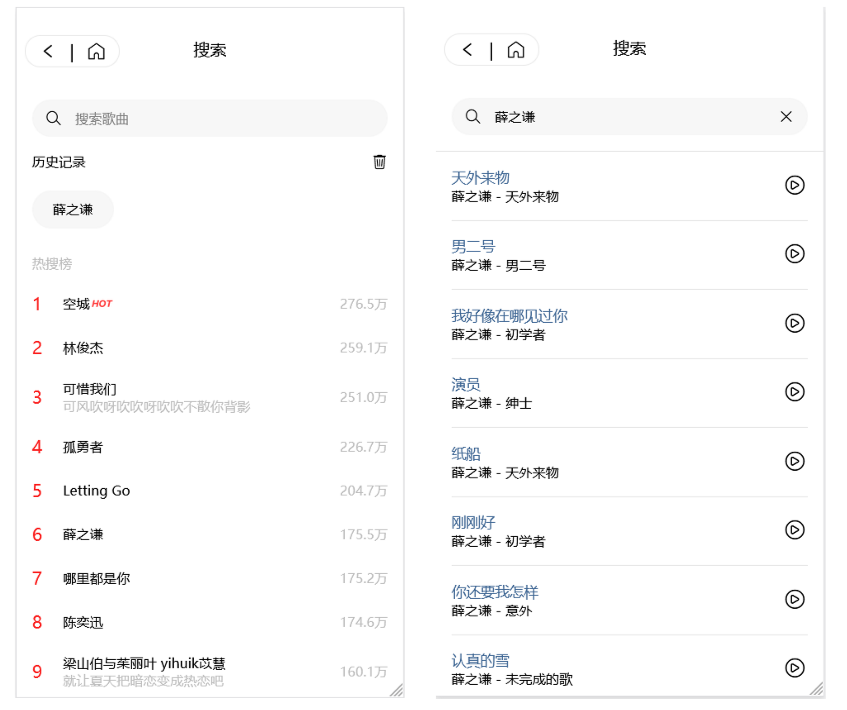
```vue
历史记录
{{ item }}
热搜榜
{{ index + 1 }}
{{ item.searchWord }}
{{ item.content }}
{{ item.score | formatCount }}
{{ item.name }}
{{ item.artists[0].name }} - {{ item.album.name }}
搜索"{{ this.searchWord }}"
{{ item.keyword }}
```
### 5.2 搜索页接口
```javascript
http://localhost:3000/search/hot/detail ##热词的接口
http://localhost:3000/search?keywords=少年 ##歌曲搜索结果接口
http://localhost:3000/search/suggest?keywords=少年&type=mobile ##提示,你如输入"少"会提示可能出现的歌曲
```
封装一下接口:
```javascript
export function searchHot() {
return uni.request({
url: `${baseUrl}/search/hot/detail`,
method: 'GET'
})
}
export function searchWord(word) {
return uni.request({
url: `${baseUrl}/search?keywords=${word}`,
method: 'GET'
})
}
export function searchSuggest(word) {
return uni.request({
url: `${baseUrl}/search/suggest?keywords=${word}&type=mobile`,
method: 'GET'
})
}
```
### 5.3 数据渲染
在5.1节数据已经渲染好了
### 5.4 搜索提示
可能有的同学不知道搜索提示是什么,其实他是我们生活中非常常见的一个功能,由下面的动图演示一下
我们写一下搜索提示的逻辑
```vue
搜索"{{ this.searchWord }}"
{{ item.keyword }}
```
这里小程序可能会有一点点问题,稍微修改一下就好
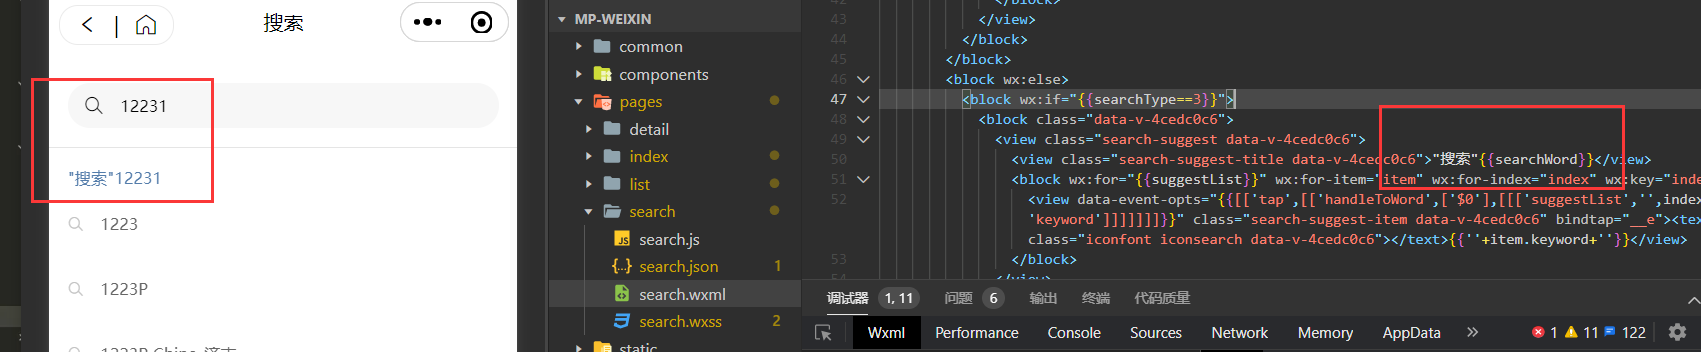
```javascript
```
```javascript
handleToSuggest(ev){
let value = ev.detail.value;
//为空返回第一页
if(!value){
this.searchType = 1;
return;
}
searchSuggest(value).then((res)=>{
if(res[1].data.code == '200'){
this.suggestList = res[1].data.result.allMatch;
this.searchType = 3;
}
});
},
```
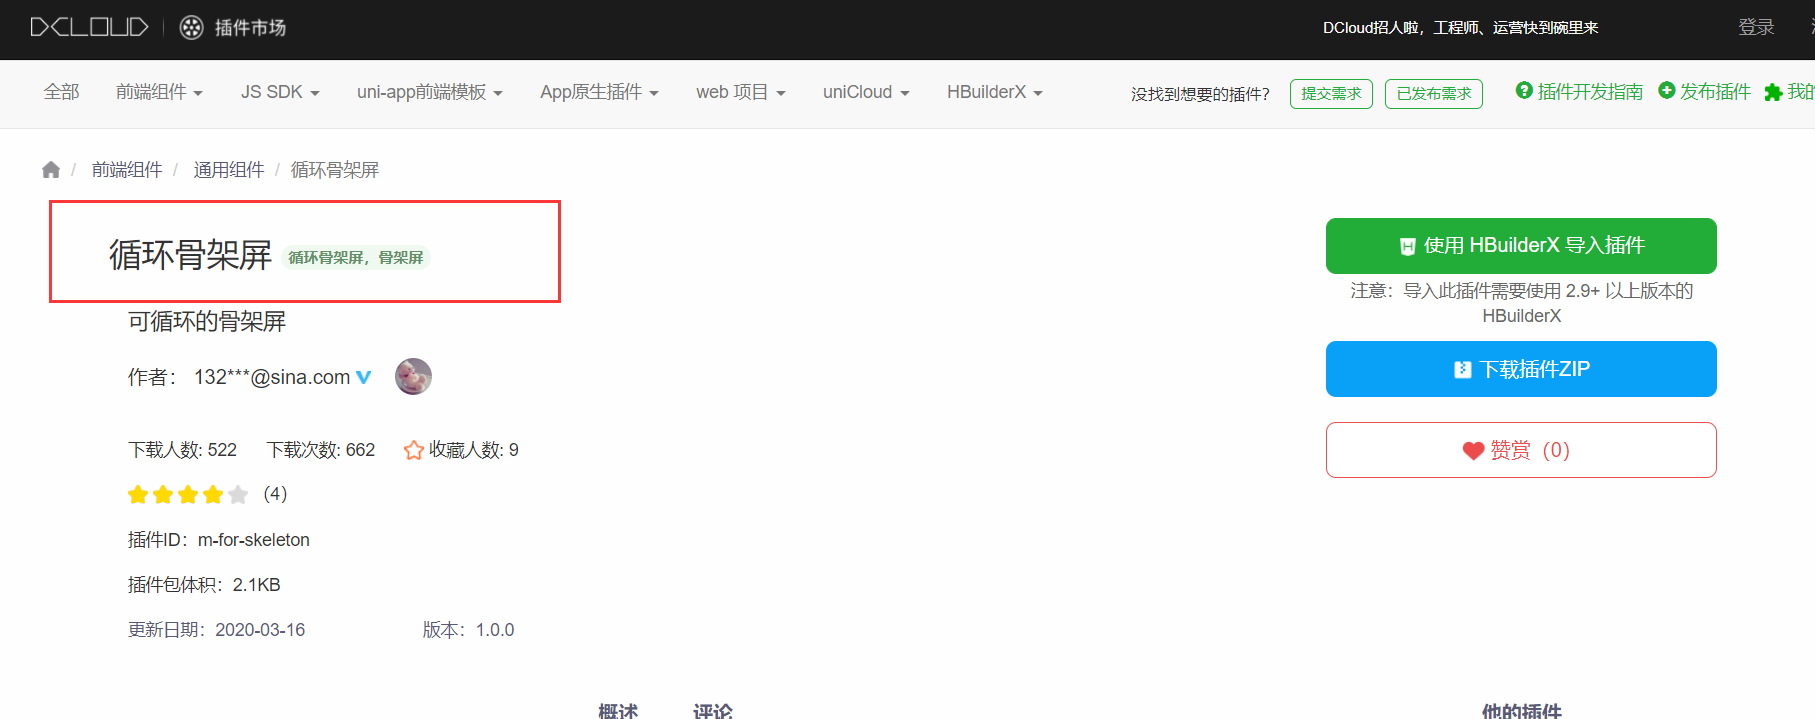
## 6. 首页骨架屏显示
用`Loading`框还是不够优雅,这里我们使用比较常见的骨架屏进行处理
我们去uniapp的插件市场搜索一下骨架屏插件,点击右边添加到自己的HBuilderX中
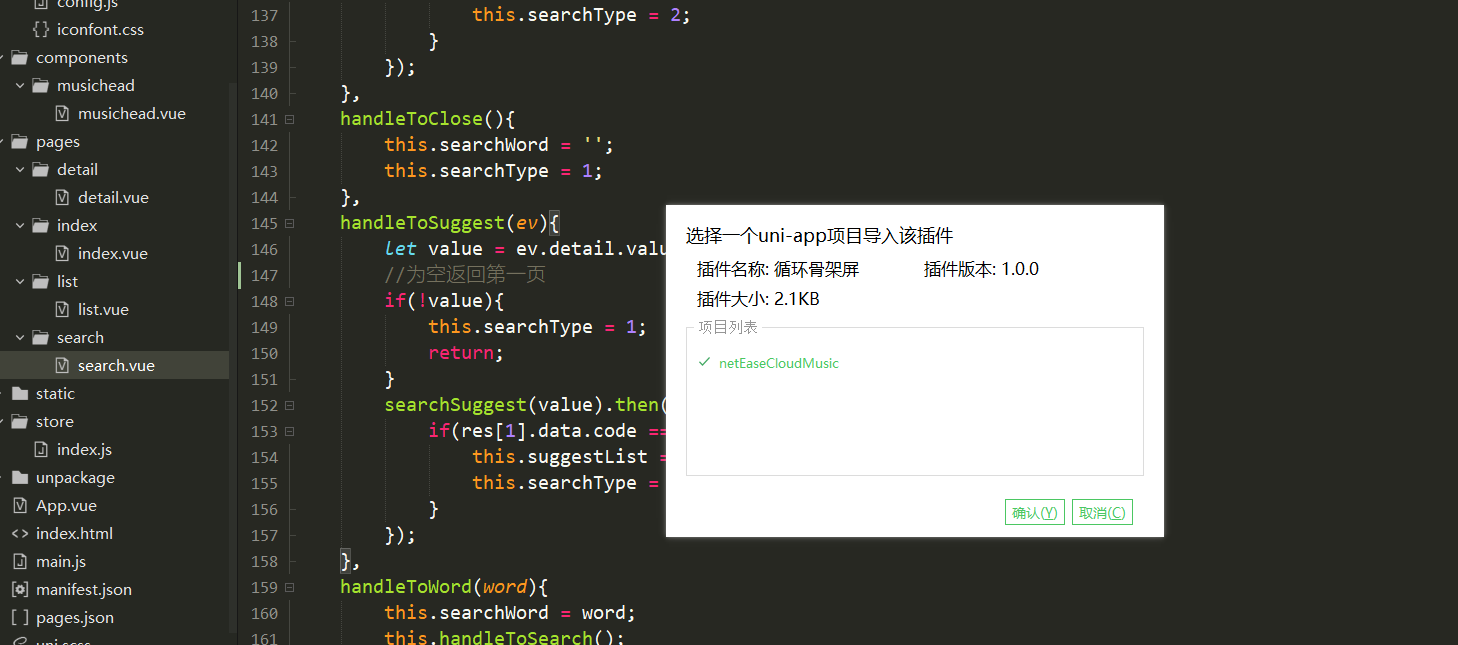
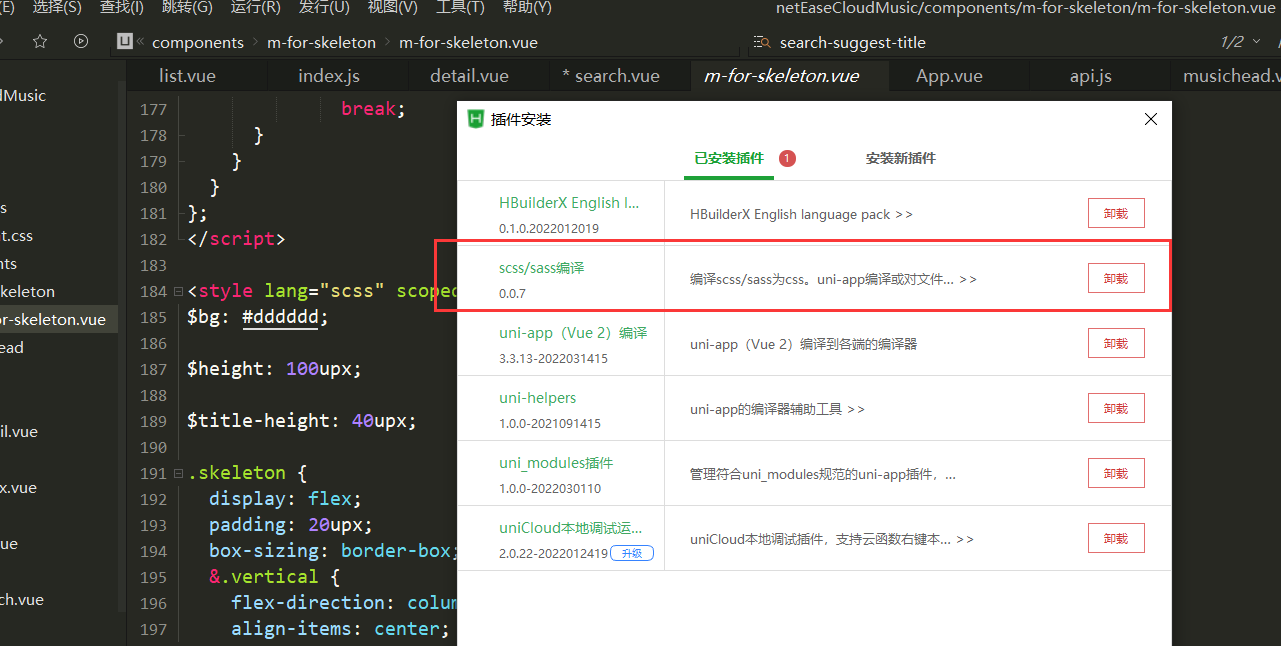
可以看到自动就安装好了,但是插件里面的样式是用scss写的,我们需要安装一下插件才能编译
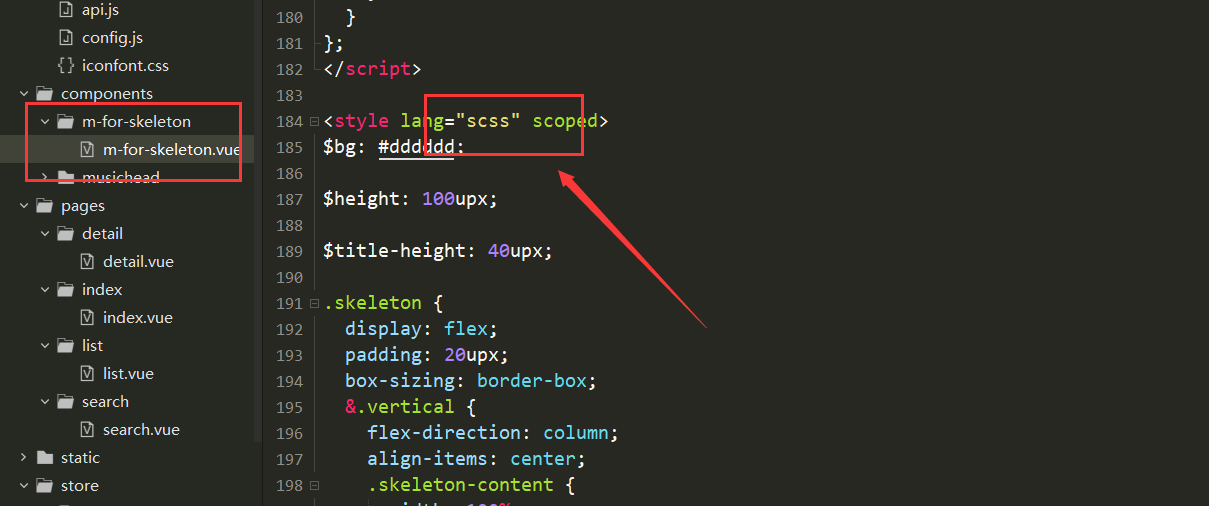
一般是默认安装好的
>使用
先导入组件
```javascript
// 导入组件
import mForSkeleton from "@/components/m-for-skeleton/m-for-skeleton";
```
## 1. 环境准备
项目所需环境:
- 网易云音乐接口文档(非官方):https://neteasecloudmusicapi.vercel.app/#/
- 音乐接口后端地址:https://github.com/Binaryify/NeteaseCloudMusicApi
- 自行下载HBuildX和微信小程序开发助手并注册小程序开发者账户
### 1.1 本地安装后端
首先我们需要把后端代码克隆下来:
```java
git clone https://github.com/Binaryify/NeteaseCloudMusicApi.git
```

安装项目所需的依赖模块(cmd进入项目)
```java
cnpm i
```
安装好了就可以启动了
```java
npm start
```
然后就可以访问后端了,默认端口3000

### 1.2 docker安装后端
>我这里在服务器上用docker安装一次
先拉取镜像:
```java
docker pull binaryify/netease_cloud_music_api
```

启动:
```java
docker run -d -p 3000:3000 --name netease_cloud_music_api binaryify/netease_cloud_music_api
```
这里接口文档有一些提示:
>注意: 在 docker 中运行的时候, 由于使用了 request 来发请求, 所以会检查几个 proxy 相关的环境变量(如下所列), 这些环境变量 会影响到 request 的代理, 详情请参考[request 的文档](https://github.com/request/request#proxies), 如果这些环境变量 指向的代理不可用, 那么就会造成错误, 所以在使用 docker 的时候一定要注意这些环境变量. 不过, 要是你在 query 中加上了 proxy 参数, 那么环境变量会被覆盖, 就会用你通过 proxy 参数提供的代理了.
我这里没管了,详情请参见官网(可以私信我要一下我的接口)
## 2. 首页
选择创建uniapp的项目并配置好你的小程序AppID

### 2.1 自定义navigationStyle
我们可以将navigationStyle设置为空然后自定义
```java
"navigationStyle":"custom"
```

### 2.2 封装navigationStyle组件
由于navigationStyle在很多界面都需要用到,所以我们可以将其封装成为一个组件

这里的设置和vue一样,现在index.vue里面使用自定义的组件,然后将值传给封装好的组件
```vue
```
组件用`props:['title']`进行接收:
```vue
{{title}}
```
### 2.3 首页基本布局
```vue
每天更新
1. 音乐一
1. 音乐一
1. 音乐一
```
先将样式写到这里:

### 2.4 接口调用&数据渲染
>接下来我们去调用我们的接口
在官方文档里面搜索排行榜,找到接口对应的调用方式
```java
所有榜单内容摘要
说明 : 调用此接口,可获取所有榜单内容摘要
接口地址 : /toplist/detail
调用例子 : /toplist/detail
```
我们将所有的请求都封装好,在common目录下创建两个文件`config.js`和`api.js`
config.js
```vue
export const baseUrl = 'http://localhost:3000/';
```
api.js
```javascript
import { baseUrl } from './config.js';
/**
* 歌曲榜单
*/
export function topList(){
// 只需要前四个榜单
var listIds = ['3' , '0' , '2' , '1' ];
return new Promise(function(resolve,reject){
uni.request({
url: `${baseUrl}/toplist/detail`,
method: 'GET',
data: {},
success: res => {
console.log(res);
let result = res.data.list;
result.length = 4;
for(let i=0;i {
console.log(err);
},
complete: () => {}
});
});
}
```
在首页渲染数据
```vue
{{item.updateFrequency}}
{{index+1}}.{{musicItem.first}}.{{musicItem.second}}
```
渲染好后前端就有界面了

## 3. 榜单详情页
接下来我们做首页里面的详情页面
首先我们先创建对应的文件

在`pages.json`中会自动生成路由,记得将head改成我们自定义的
```javascript
"navigationStyle":"custom",
```
接下来我们设置一下编译模式让我们不需要每次都点到这个界面中
### 3.1 详情页布局
先进行简单布局,添加一张背景图片
```vue
```
样式写到全局配置文件App.vue中
```css
.flexbg {
z-index: -1;
width: 100%;
height: 100vh;
position: fixed;
left: 0;
top: 0;
background-image: url(./static/wangyiyunyinyue.png);
background-size: cover;
background-position: center 0;
/* 背景模糊以及毛边框特效 */
filter: blur(10px);
transform: scale(1.2);
}
```
我们就可以得到一个基本的样子:

### 3.2 渲染数据
接下来我们写此界面中滚动条的部分
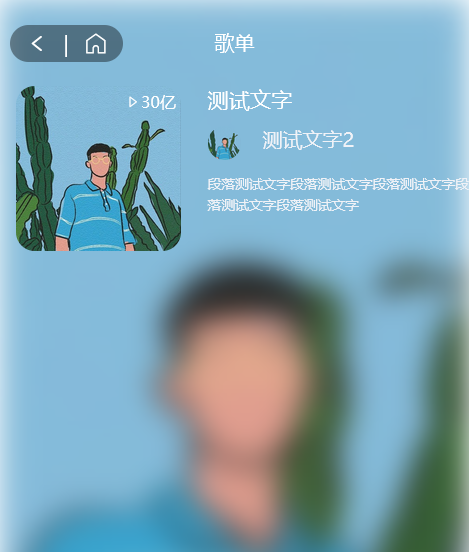
我们先写一下上面的布局
```vue
30亿
测试文字
测试文字2
段落测试文字段落测试文字段落测试文字段落测试文字段落测试文字
```
写完之后基本的样子就有了

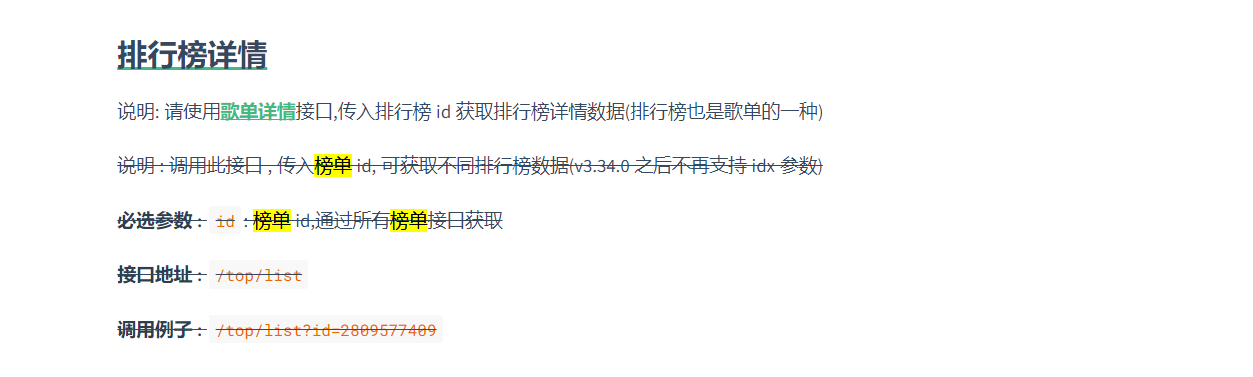
>这里有一个问题,网易云对榜单歌曲的接口进行了限制,在不登录情况下是拿不到信息的

这里我们只能曲线救国,通过歌曲详情接口拿到这些数据,具体做法为:

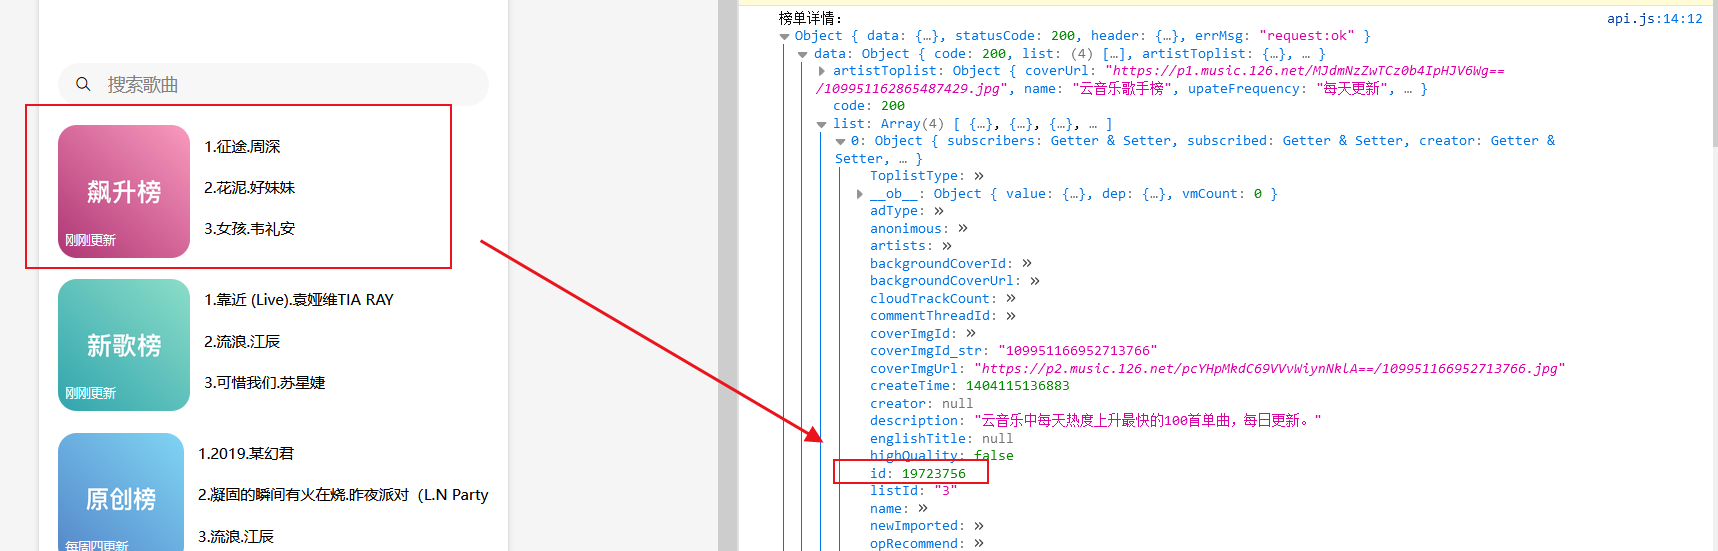
先拿到榜单的id直接传给list组件

list组件再拿着id调用歌单接口:
```javascript
/**
* 根据首页歌曲模块获取具体歌单
* @param {列表id} listId
*/
export function list(listId){
return uni.request({
url: `${baseUrl}/playlist/detail?id=${listId}`,
method: 'GET'
});
}
```
这样就可以再不登录的情况下拿到自己想要的榜单数据

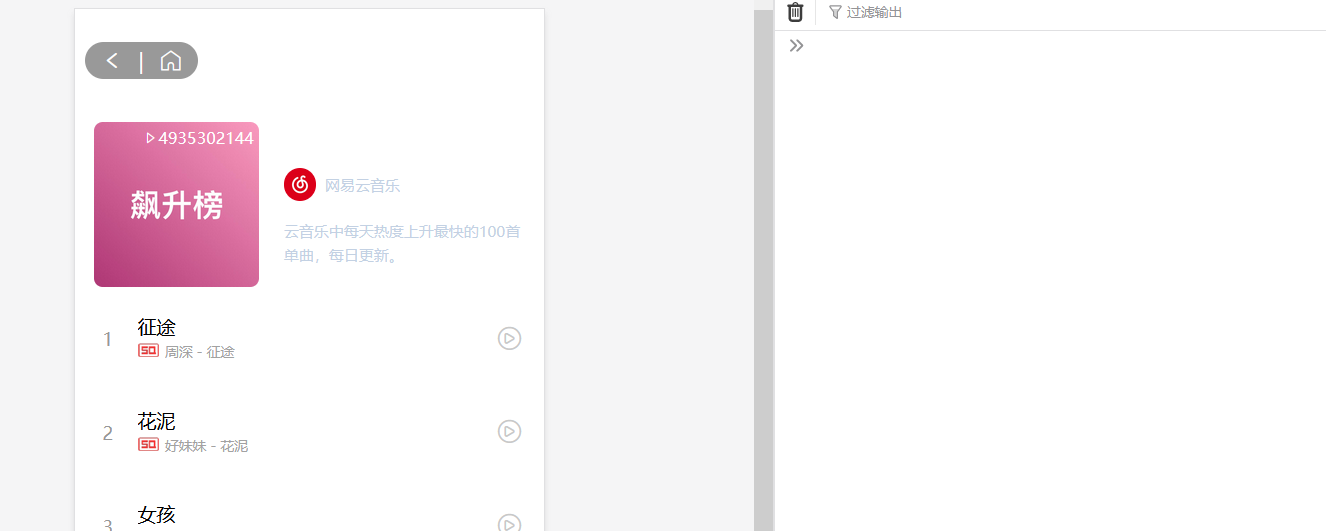
现在我们将数据渲染上去:
其中列表下面可能会有SQ(高清)和`独家`的标识,这两个标识可以从下面字段拿到

这里我们添加一个过滤器将榜单上面的数字格式一下,这里由于后面点赞也需要用到这个过滤器,所以我们写到全局文件里面
```vue
Vue.filter('formatCount',function(value){
if( value >= 10000 && value < 100000000 ){
value /= 10000;
return value.toFixed(1) + '万';
}
else if(value >= 100000000){
value /= 100000000;
return value.toFixed(1) + '亿';
}
else{
return value;
}
});
```

### 3.3 完整代码
这里贴一下完整的代码:
完成后的效果就是这样了,其实已经和网易云一模一样了

```vue
{{ playlist.playCount | formatCount }}
{{ playlist.name }}
{{ playlist.creator.nickname }}
{{ playlist.description }}
播放全部
(共{{ playlist.trackCount }}首)
{{ index + 1 }}
{{ item.name }}
{{ item.ar[0].name }} - {{ item.name }}
```
## 4. 歌曲详情页
同样我们要写成自定义头的形式
首先我们写跳转的代码,在每首歌的item中添加事件
```javascript
@tap="handleToDetail(item.id)
methods: {
handleToDetail(id) {
uni.navigateTo({
url: '/pages/detail/detail?songId=' + id
});
}
}
```
### 4.1 歌曲详细页布局
这里的布局元素就稍稍要丰富一些了
先对播放的圆盘以及那根棍子布局一下

写一点样式让其位置更加合理
```css
.detail-play{ width:580rpx; height:580rpx; background:url(~@/static/disc.png); background-size:cover; margin:210rpx auto 44rpx auto; position: relative;}
.detail-play image{ width:380rpx; height:380rpx; border-radius: 50%; position: absolute; left:0; top:0; right:0; bottom:0; margin:auto; animation:10s linear infinite move; animation-play-state: paused;}
@keyframes move{
from{ transform : rotate(0deg);}
to{ transform : rotate(360deg);}
}
.detail-play .detail-play-run{ animation-play-state: running;}
.detail-play text{ width:100rpx; height:100rpx; font-size:100rpx; position: absolute; left:0; top:0; right:0; bottom:0; margin:auto; color:white;}
.detail-play view{ position: absolute; width:170rpx; height:266rpx; position: absolute; left:60rpx; right:0; margin:auto; top:-170rpx; background:url(~@/static/needle.png); background-size:cover;}
```
调完样式之后布局就比较合理了

接下来就是其他的一些布局,这里有的组件就不做了
这里写的断断续续的就把最后面弄好的一起贴上来吧,这里面包含了渲染数据的部分,布局的代码都注释掉了
效果:

```vue
{{ item.lyric }}
喜欢这首歌的人也听
{{item.name}}
{{item.artists[0].name}} - {{item.name}}
```
### 4.2 歌曲接口
```css
http://localhost:3000/song/detail?ids=483937795 ##歌曲详情接口
http://localhost:3000/simi/song?id=483937795 ##和当前歌曲相似的歌曲接口
http://localhost:3000/comment/music?id=483937795 ##歌曲评论接口
http://localhost:3000/lyric?id=483937795 ##歌词接口
http://localhost:3000/song/url?id=483937795 ##播放音乐接口
```
我们在api.js里将这些接口封装一下
```javascript
/**
* 歌曲详情接口
* @param {歌曲id} id
*/
export function songDetail(id) {
return uni.request({
url: `${baseUrl}/song/detail?ids=${id}`,
method: 'GET'
})
}
/**
* 播放歌曲接口
* @param {Object} id
*/
export function songUrl(id) {
return uni.request({
url: `${baseUrl}/song/url?id=${id}`,
method: 'GET'
})
}
/**
* 歌词接口
* @param {Object} id
*/
export function songLyric(id) {
return uni.request({
url: `${baseUrl}/lyric?id=${id}`,
method: 'GET'
})
}
/**
* 和当前歌曲类似歌曲接口
* @param {Object} id
*/
export function songSimi(id) {
return uni.request({
url: `${baseUrl}/simi/song?id=${id}`,
method: 'GET'
})
}
/**
* 评论接口
* @param {Object} id
*/
export function songComment(id) {
return uni.request({
url: `${baseUrl}/comment/music?id=${id}`,
method: 'GET'
})
}
```
### 4.3 数据渲染
在4.1里面已经有渲染的代码了
### 4.4 设置背景音乐管理器
这里需要配置一下,不然在微信小程序端会出现不能播放音乐的现象
```css
"requireBackgroudModes":["audio"]
```

### 4.5 VueX共享数据
现在我们有一个问题,当播放完一首歌后我们需要它自动切换到下一首歌,这里就需要我们用VueX传递一下信息了
在Uniapp中内置了VueX,所以不用安装依赖了可以直接引入

```javascript
this.$store.commit('INIT_CHANGE', this.playlist.trackIds);
```
我们看一下有没有存入

接下来让其播放下一首就可以了

## 5. 搜索页
### 5.1 搜索页布局
这里的布局和之前类似,先把组件和一些一样的样式复制过来,这里直接贴一下样式

```vue
历史记录
{{ item }}
热搜榜
{{ index + 1 }}
{{ item.searchWord }}
{{ item.content }}
{{ item.score | formatCount }}
{{ item.name }}
{{ item.artists[0].name }} - {{ item.album.name }}
搜索"{{ this.searchWord }}"
{{ item.keyword }}
```
### 5.2 搜索页接口
```javascript
http://localhost:3000/search/hot/detail ##热词的接口
http://localhost:3000/search?keywords=少年 ##歌曲搜索结果接口
http://localhost:3000/search/suggest?keywords=少年&type=mobile ##提示,你如输入"少"会提示可能出现的歌曲
```
封装一下接口:
```javascript
export function searchHot() {
return uni.request({
url: `${baseUrl}/search/hot/detail`,
method: 'GET'
})
}
export function searchWord(word) {
return uni.request({
url: `${baseUrl}/search?keywords=${word}`,
method: 'GET'
})
}
export function searchSuggest(word) {
return uni.request({
url: `${baseUrl}/search/suggest?keywords=${word}&type=mobile`,
method: 'GET'
})
}
```
### 5.3 数据渲染
在5.1节数据已经渲染好了
### 5.4 搜索提示
可能有的同学不知道搜索提示是什么,其实他是我们生活中非常常见的一个功能,由下面的动图演示一下

我们写一下搜索提示的逻辑
```vue
搜索"{{ this.searchWord }}"
{{ item.keyword }}
```
这里小程序可能会有一点点问题,稍微修改一下就好

```javascript
```
```javascript
handleToSuggest(ev){
let value = ev.detail.value;
//为空返回第一页
if(!value){
this.searchType = 1;
return;
}
searchSuggest(value).then((res)=>{
if(res[1].data.code == '200'){
this.suggestList = res[1].data.result.allMatch;
this.searchType = 3;
}
});
},
```
## 6. 首页骨架屏显示
用`Loading`框还是不够优雅,这里我们使用比较常见的骨架屏进行处理
我们去uniapp的插件市场搜索一下骨架屏插件,点击右边添加到自己的HBuilderX中


可以看到自动就安装好了,但是插件里面的样式是用scss写的,我们需要安装一下插件才能编译

一般是默认安装好的

>使用
先导入组件
```javascript
// 导入组件
import mForSkeleton from "@/components/m-for-skeleton/m-for-skeleton";
```